

- Joined
- Jun 3, 2006
- Messages
- 73
- Reaction score
- 7
- Gender
- Hidden
- Country
-

Contents
_________________________________________________
Notes
Almost all the manga cleaning tutorials out there are for Japanese shounen titles. The art syle is - for the most part - relatively simple with a lot of clean lines. The manhua I edit is the exact opposite and, because of this, I find few cleaning tutorials to be all that helpful. Hence, this tutorial. I'm hoping that cleaners/editors of all sorts of manga - from the ones with a simple art style like Naruto to the ones with a complicated, detailed art style - will find something useful here.
I made this tutorial for Photoshop users. The instructions should work for most versions of Photoshop, though I'm not 100% sure of anything earlier than PS v7. I'm starting out with the really simple stuff and am going to work up to the more complicated techniques that I use. Please forgive my untechnical language. I'm trying to make this tutorial as simple as possible.
_________________________________________________
Curves & Levels
Making the blacks black and the whites white on a raw page is really very simple. The first step is to go to Layer > New Adjustment Layer > Curves or Layer > New Adjustment Layer > Levels. I prefer to use Curves, so thats what Ill be baseing this section on. The instructions are pretty much the same for each. Click OK on the first box that pops up. The second box should be the Curves (or Levels) box.
[Note: You can also make a Curves or Levels layer by clicking on the small circular icon, the third from the right, at the bottom of the layers palatte and selecting Curves or Layers.]
I'm starting with this scan from chapter fifty-seven.
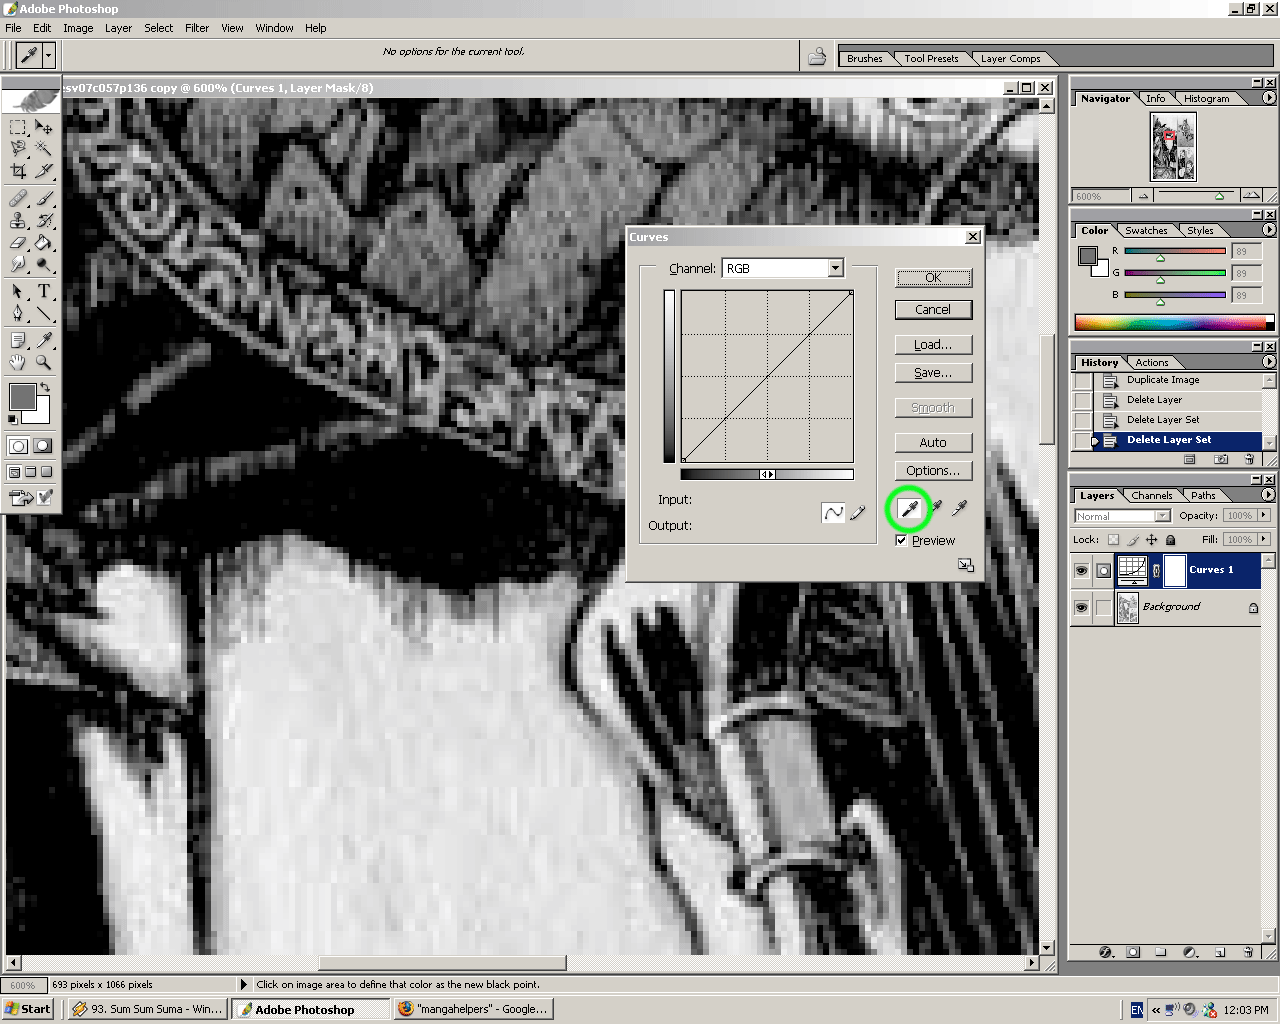
Now, in the right hand corner of the box there is a row of three eyedropper icons. Click on the eyedropper on the left the one that looks to be filled with black. Now click on the part of the image you want to be black like the shadows. This may make the blacks too dark or not dark enough. If so, click around the dark area to find the exact spot to darken youll have to just experiment until you find it.

The black eyedropper.
Click to enlarge.
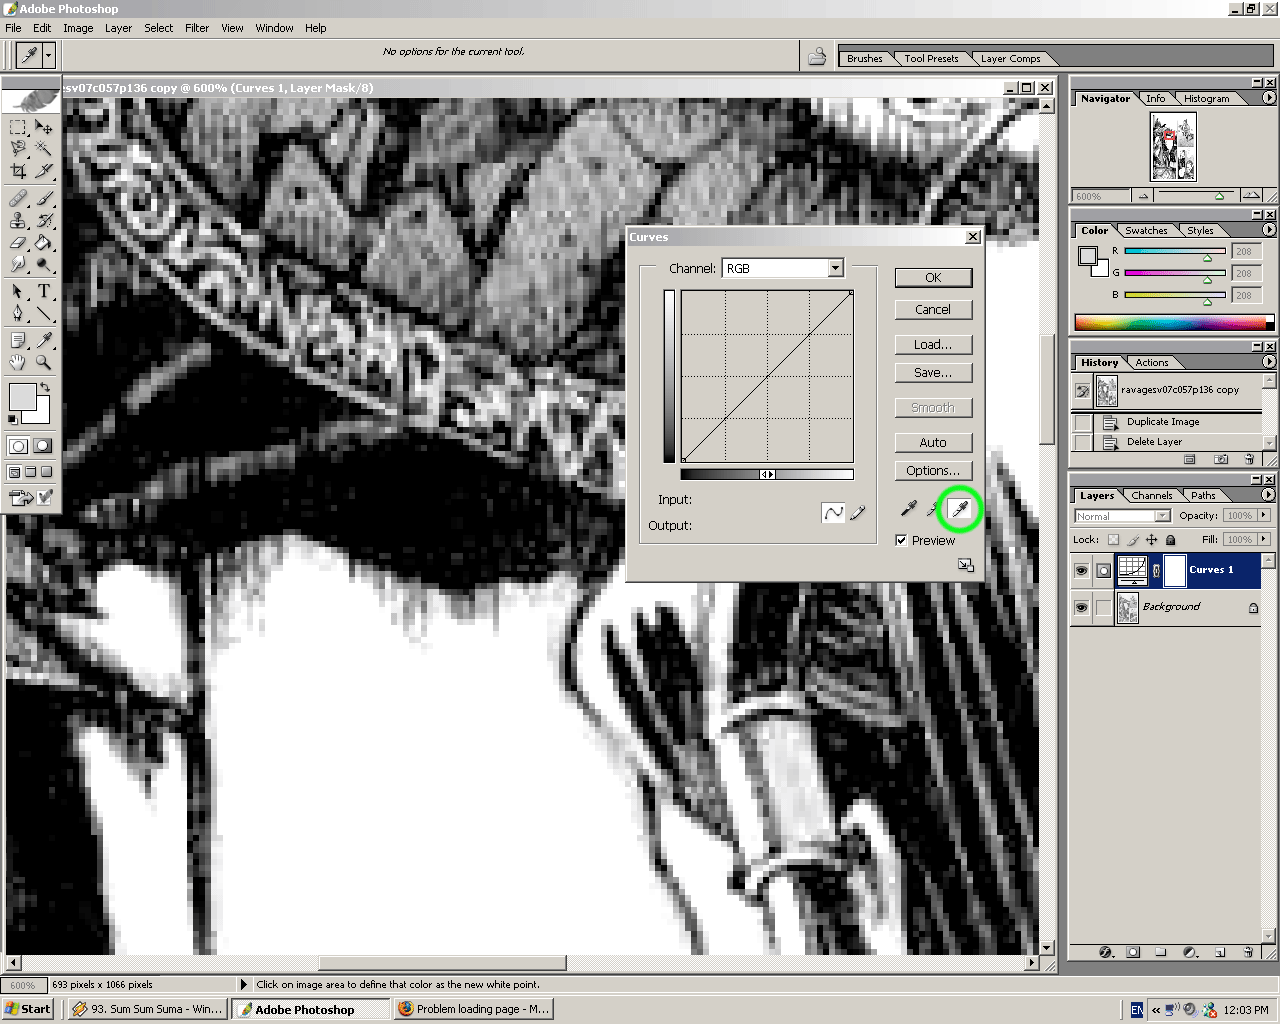
Once you set the black point, go back to the Curves/Levels box and click the eyedropper on the right the one that appears to be filled with white. Now you basically repeat the same steps as with the black eyedropper only now youre setting the white point. You may need to experiment and adjust by switching back and forth between the white eyedropper and the black in order to get the contrast you desire, but once youre done just click OK.

The white eyedropper.
Click to enlarge.
After finishing with the above Curves settings, the image should look something like this. [I'll show how I remove the darkness on the left side of the page in a later tutorial.]
You dont really need to bother with anything else in the Curves/Levels box unless you feel it's really necessary.
In the next update I'll show how I straighten crooked pages using the measure tool.
_________________________________________________
Other Tutorials
Here are a few other tutorials that I've found to be helpful.
- Notes
- Curves & Levels
- Other Tutorials
_________________________________________________
Notes
Almost all the manga cleaning tutorials out there are for Japanese shounen titles. The art syle is - for the most part - relatively simple with a lot of clean lines. The manhua I edit is the exact opposite and, because of this, I find few cleaning tutorials to be all that helpful. Hence, this tutorial. I'm hoping that cleaners/editors of all sorts of manga - from the ones with a simple art style like Naruto to the ones with a complicated, detailed art style - will find something useful here.
I made this tutorial for Photoshop users. The instructions should work for most versions of Photoshop, though I'm not 100% sure of anything earlier than PS v7. I'm starting out with the really simple stuff and am going to work up to the more complicated techniques that I use. Please forgive my untechnical language. I'm trying to make this tutorial as simple as possible.
_________________________________________________
Curves & Levels
Making the blacks black and the whites white on a raw page is really very simple. The first step is to go to Layer > New Adjustment Layer > Curves or Layer > New Adjustment Layer > Levels. I prefer to use Curves, so thats what Ill be baseing this section on. The instructions are pretty much the same for each. Click OK on the first box that pops up. The second box should be the Curves (or Levels) box.
[Note: You can also make a Curves or Levels layer by clicking on the small circular icon, the third from the right, at the bottom of the layers palatte and selecting Curves or Layers.]
I'm starting with this scan from chapter fifty-seven.
Now, in the right hand corner of the box there is a row of three eyedropper icons. Click on the eyedropper on the left the one that looks to be filled with black. Now click on the part of the image you want to be black like the shadows. This may make the blacks too dark or not dark enough. If so, click around the dark area to find the exact spot to darken youll have to just experiment until you find it.
The black eyedropper.
Click to enlarge.
Once you set the black point, go back to the Curves/Levels box and click the eyedropper on the right the one that appears to be filled with white. Now you basically repeat the same steps as with the black eyedropper only now youre setting the white point. You may need to experiment and adjust by switching back and forth between the white eyedropper and the black in order to get the contrast you desire, but once youre done just click OK.
The white eyedropper.
Click to enlarge.
After finishing with the above Curves settings, the image should look something like this. [I'll show how I remove the darkness on the left side of the page in a later tutorial.]
You dont really need to bother with anything else in the Curves/Levels box unless you feel it's really necessary.
In the next update I'll show how I straighten crooked pages using the measure tool.
_________________________________________________
Other Tutorials
Here are a few other tutorials that I've found to be helpful.
Last edited:
